RAW MATERIALS
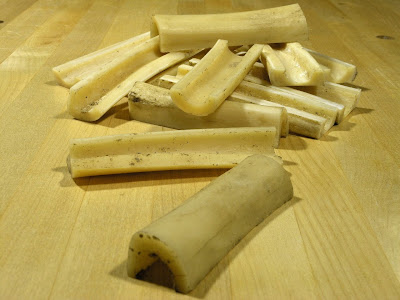
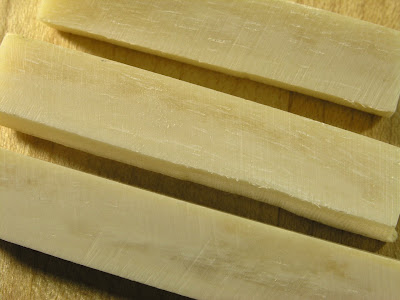
As I wanted to try and do this build from scratch as much a s possible, I bought some bone for nuts and saddles on eBay a while back. The vendors description at the time was: "2 lbs of treated cattle bone for carving", with a photo of a number of bone pieces cut in half next to a ruler showing them at about 4" long, a little on the small side, but I hoped that with a bit of effort I should be able to get a fair amount of pieces cut from them. I got the lot for about $12 plus $8 for shipping. They arrived as described and everything was honky dory.
I had been following discussions and articles on the net about suitable material for nuts and saddles, and there seems to be many possibilities and options. From man made materials like Corian and Micarta, to wood, shell, bone, horn, tusk and even stone and metals. But most sources tooted bone as very suitable for the job, because of it's density, workability, look and price.
Over the summer I attended a serious of lectures at my work by a paleontologist called Stuart Sumida. It was an obvious opportunity to pick his brain. I showed him the bones I bought and told him what they were for. He guessed they might be phalanges - finger or toe bones.
I also asked him what bone was the densest you could find, to which he answered a Baculum or penis bone. Apparently, if an male breaks this bone, there is no way any female with just a little self respect would ever even consider a 'little bit of how's your farther' if that bone wasn't intact on the male, and if you believe in evolutionary theory that should have resulted in the development of a very dense and strong bone.
Just for fun I did a little research, only to find out that they are rather small (not that I have anything to brag about), unless they come from a very large animal, and then even so, making them not very useful for nuts and saddle material. They are also protected under the same regulations as ivory, and therefore rare, expensive and best to leave them be.
CUTTING:
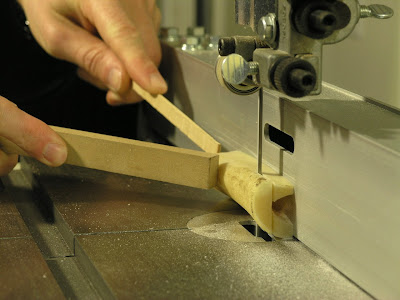
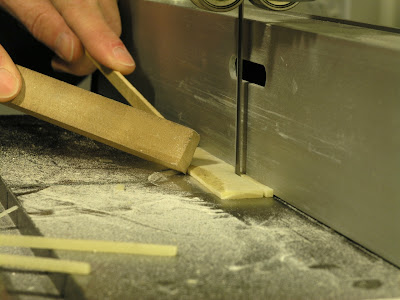
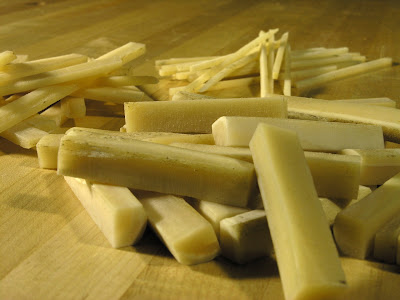
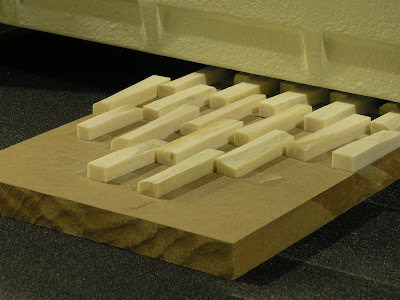
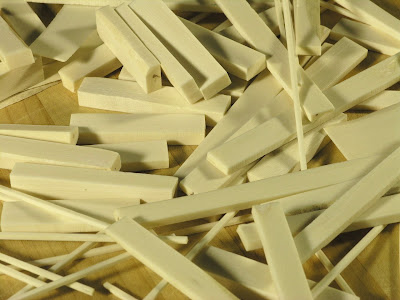
Normally, you have to cook your bone to get rid of all the soft tissue, but as mine arrive semi-cleaned I was able to get cutting right away. I selected the bones in order of thickness, selecting the one with the thickest walls for nuts and the others for saddles, and cut them on my bandsaw using a 1/4" 6TPI PC blade from Timberwolf. I tried to get as many pieces out of each bone as possible and at the same time have them as oversized as possible, leaving a variety of rough cut shapes and sizes to work with. Most of the nuts, however, came out about 1/4" x 3/8" and the saddles about 1/8" x 7/16". The longest piece of the usable leftover were cut into 1/8" squares for tieblock inlays. The rest was either kept for potential inlay material or simply discarded.
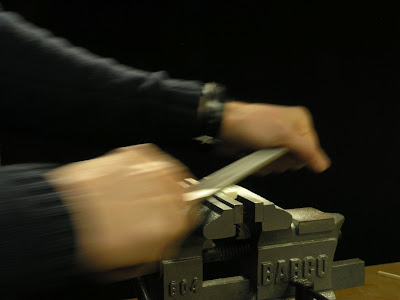
It was a little tricky to cut the bone pieces at times. I didn't dare use my hands for these small sizes and irregular shapes and using pushsticks made it a fiddly affair. Most came out in nice straight cuts but some were a little wavy too. Hopefully not more than can be cleaned up once the pieces are worked into their final shape.
One thing I did noticed though was the rather unpleasant, somewhat pungent and heavy smell of what I would imaging a crematorium smells like. I tried not to think about it to much, and stayed focused on not having any of my own bones slipping into the traveling saw blade.
DEGREASING:
One thing that became clear from all my reading was that it was imperative to degrease the living daylights out the bone before putting them on the instrument. If you don't, or do it insufficiently, the grease will continue to seep out slowly into the wood it contacts, eventually ruining glue joints and what not.
The method one article I found recommended was to first clean the soft tissue of by boiling the bone in hot water for an hour or two, either just water from the tap or in a solution of mild detergent or household armonia. The degrease the bone for 1-3 weeks in Coleman's Fuel while changing the fuel every now and then.
As the bone didn't have any soft tissue on it, I decided to skip the first part and go straight to the degreasing.
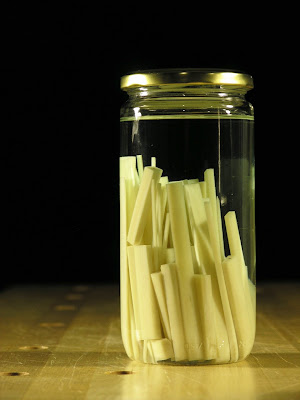
I got my Coleman's Fuel from a local sports shop that have a lot of camping gear. I read that it had to be done in a 1-10 volumes but I didn't have a jar that was big enough so I winged it a little and hoped I would be able to compensate with longer degreasing and a few more changes of fuel.
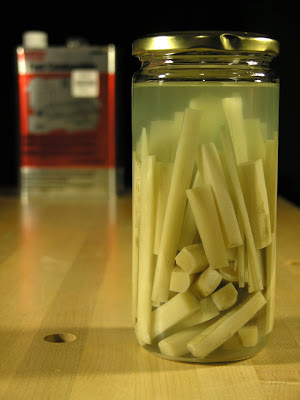
I put all the pieces into the biggest glass jar I had and filled it up to the brim. It immediately started to go cloudy from all the grease released from the surface of the bone. A day later all the residue had settled at the bottom and the fuel had gone clear again.
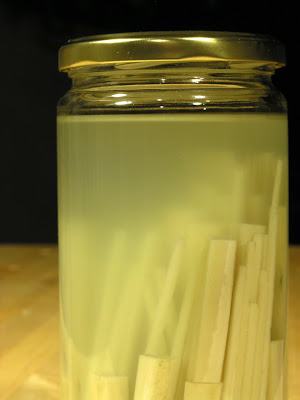
After 10 days or so I shook it all up again to see that the fuel had gone so cloudy it was almost impossible to see the bone clearly. I changed the fuel, wiped the bone as clean and dry as I could with a rag, put them back in and refilled the jar for a second round. This time there was considerable less grease showing, though still enough to be clearly visible. This cycle was repeated three times.
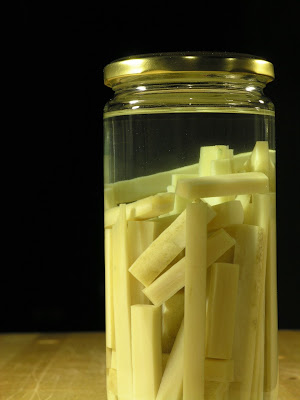
After thirty days there didn't seem to be anymore grease coming off the bone, or at least the fuel seemed to be as clear as it was when it came from the can. I took the bone out and to my surprise they still felt a little greasy to the touch, but I decided to leave them to dry and inspect them closer.
Once dry they had gone considerably whiter than before. However, I noticed that while some pieces were a quite uniform white, others had darker translucent spots on them. I don't have anything to compare this with but it appeared that despite my efforts they still had residue left in them, particularly the nuts. What to do? Could it be that I should not have skipped the boiling part after all? Was it simply a matter of the pieces lying to close together in the jar?
Regardless, I decided to start again with the degreasing process, but first all nuts and saddles were prepped by filing and sanding the rough and uneven faces clean, so at least three faces were clean and flat leaving them as big as possible for final fitting later. The tie block inlays got worked on all four sides to a 2x2mm square stick. The inlay pieces also got sanded to a 1mm thickness.
SECOND TIME AROUND
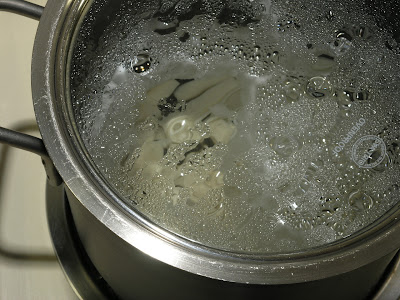
Let's do it...... in a pot with one gallon of water and 1 tsp of concentrated dish washing liquid. I put the bone in the cold water, brought the water to a boil and turned the heat down and let it simmer for and hour and a half. 1 tsp of detergent was maybe a little too much in this case, since the bone had already gone through some degreasing, but then again maybe not. The 'stew' gave off a lot of foam in the beginning, but at the end there was only little of it left.
When done I took the bone out and dried it with some paper towel. The bone seemed to be a more uniform white than before which I took to be a good thing.
The bone was left to dry for four days and then put in a jar again with some Coleman's fuel for yet another two rounds of degreasing, one week per round. I wasn't able to see any residue in the fuel after either cycles. I looked as clear as if it was straight from the can.
THE FINAL RESULT
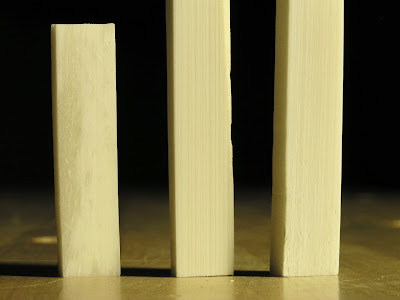
As an experiment, I left a nut and a saddle out of the cooking process and subjected them only to the last two cycles of degreasing in fuel in a separate jar. For what it is worth they continued to be darker and show more discoloration after the final degreasing process than the bone pieces that was cooked in the detergent solution. However, like the case with the cooked bone pieces, there was no visible traces of oils in the fuel afterwards in either degreasing cycles.
I'm a little uneasy about the whole thing. First of all, how do I know for sure that all the grease has gone? Some of the bone pieces still show a little discoloration, but I don't know if that is just the natural color of the bone or if it is oils still left in there. I somehow doubt that letting them sit in fuel for longer will change this, since they have already been in there for much longer than recommended, but what do I know.
Second, as evident in some of the photos below, small pores are showing in a number of the pieces, which I don't believe is a desirable thing if density is something of importance. In most cases the pieces are clean and solid looking, but in others pores are showing here and there which I hope to be able to work around. In a few the pores cover most of the surfaces and I wonder if I would be best off discarding them or using them for something entirely different.
I don't think I am going to use the 1mm flat pieces for inlay. They are very translucent and textures and colors from the wood it is laid into will likely show through the bone. I should either have kept them thicker, or perhaps bone is not really well suited for the purpose in the first place.
ADDENDUM
A couple of weeks after I wrote this post I decided to go through the degreasing process yet one more time. Despite the fact that the fuel didn't appear to extract any more grease from the bone pieces during that last couple of soaking cycles, it still bothered me that a few of the pieces displayed translucent spots on them. And so I repeated the whole process of boiling in soapy water for 2 hours, drying for three days, three weeks of soaking in fuel in three one week cycles.
If they are not clean by now, I don't know what it takes to get them to be....................
One thing that became clear from all my reading was that it was imperative to degrease the living daylights out the bone before putting them on the instrument. If you don't, or do it insufficiently, the grease will continue to seep out slowly into the wood it contacts, eventually ruining glue joints and what not.
The method one article I found recommended was to first clean the soft tissue of by boiling the bone in hot water for an hour or two, either just water from the tap or in a solution of mild detergent or household armonia. The degrease the bone for 1-3 weeks in Coleman's Fuel while changing the fuel every now and then.
As the bone didn't have any soft tissue on it, I decided to skip the first part and go straight to the degreasing.
I got my Coleman's Fuel from a local sports shop that have a lot of camping gear. I read that it had to be done in a 1-10 volumes but I didn't have a jar that was big enough so I winged it a little and hoped I would be able to compensate with longer degreasing and a few more changes of fuel.
I put all the pieces into the biggest glass jar I had and filled it up to the brim. It immediately started to go cloudy from all the grease released from the surface of the bone. A day later all the residue had settled at the bottom and the fuel had gone clear again.
After 10 days or so I shook it all up again to see that the fuel had gone so cloudy it was almost impossible to see the bone clearly. I changed the fuel, wiped the bone as clean and dry as I could with a rag, put them back in and refilled the jar for a second round. This time there was considerable less grease showing, though still enough to be clearly visible. This cycle was repeated three times.
After thirty days there didn't seem to be anymore grease coming off the bone, or at least the fuel seemed to be as clear as it was when it came from the can. I took the bone out and to my surprise they still felt a little greasy to the touch, but I decided to leave them to dry and inspect them closer.
Once dry they had gone considerably whiter than before. However, I noticed that while some pieces were a quite uniform white, others had darker translucent spots on them. I don't have anything to compare this with but it appeared that despite my efforts they still had residue left in them, particularly the nuts. What to do? Could it be that I should not have skipped the boiling part after all? Was it simply a matter of the pieces lying to close together in the jar?
Regardless, I decided to start again with the degreasing process, but first all nuts and saddles were prepped by filing and sanding the rough and uneven faces clean, so at least three faces were clean and flat leaving them as big as possible for final fitting later. The tie block inlays got worked on all four sides to a 2x2mm square stick. The inlay pieces also got sanded to a 1mm thickness.
SECOND TIME AROUND
Let's do it...... in a pot with one gallon of water and 1 tsp of concentrated dish washing liquid. I put the bone in the cold water, brought the water to a boil and turned the heat down and let it simmer for and hour and a half. 1 tsp of detergent was maybe a little too much in this case, since the bone had already gone through some degreasing, but then again maybe not. The 'stew' gave off a lot of foam in the beginning, but at the end there was only little of it left.
When done I took the bone out and dried it with some paper towel. The bone seemed to be a more uniform white than before which I took to be a good thing.
The bone was left to dry for four days and then put in a jar again with some Coleman's fuel for yet another two rounds of degreasing, one week per round. I wasn't able to see any residue in the fuel after either cycles. I looked as clear as if it was straight from the can.
THE FINAL RESULT
As an experiment, I left a nut and a saddle out of the cooking process and subjected them only to the last two cycles of degreasing in fuel in a separate jar. For what it is worth they continued to be darker and show more discoloration after the final degreasing process than the bone pieces that was cooked in the detergent solution. However, like the case with the cooked bone pieces, there was no visible traces of oils in the fuel afterwards in either degreasing cycles.
I'm a little uneasy about the whole thing. First of all, how do I know for sure that all the grease has gone? Some of the bone pieces still show a little discoloration, but I don't know if that is just the natural color of the bone or if it is oils still left in there. I somehow doubt that letting them sit in fuel for longer will change this, since they have already been in there for much longer than recommended, but what do I know.
Second, as evident in some of the photos below, small pores are showing in a number of the pieces, which I don't believe is a desirable thing if density is something of importance. In most cases the pieces are clean and solid looking, but in others pores are showing here and there which I hope to be able to work around. In a few the pores cover most of the surfaces and I wonder if I would be best off discarding them or using them for something entirely different.
I don't think I am going to use the 1mm flat pieces for inlay. They are very translucent and textures and colors from the wood it is laid into will likely show through the bone. I should either have kept them thicker, or perhaps bone is not really well suited for the purpose in the first place.
ADDENDUM
A couple of weeks after I wrote this post I decided to go through the degreasing process yet one more time. Despite the fact that the fuel didn't appear to extract any more grease from the bone pieces during that last couple of soaking cycles, it still bothered me that a few of the pieces displayed translucent spots on them. And so I repeated the whole process of boiling in soapy water for 2 hours, drying for three days, three weeks of soaking in fuel in three one week cycles.
If they are not clean by now, I don't know what it takes to get them to be....................
RAW BONE PIECES
CUTTING BONE
CUTTING TIE BLOCK INLAYS
ROUGH CUT NUTS, SADDLES AND TIE BLOCK INLAYS
DEGREASING BONE IN COLEMAN'S FUEL
DEGREASING BONE - AFTER 10 DAYS
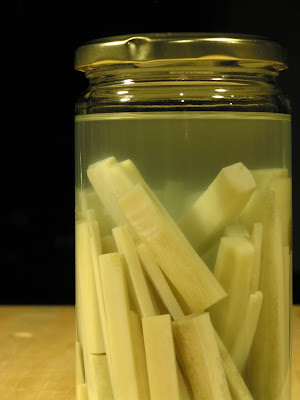
DEGREASING BONE - AFTER 20 DAYS
DEGREASING BONE - AFTER 30 DAYS
BONE WITH GREASE RESIDUE OR DISCOLORATION
ROUGH SHAPING NUTS
SANDING NUTS TO SHAPE
BOILING ALL THE PIECES
FINAL DEGREASING - AFTER 45 DAYS
THE DEGREASED BONE PIECES
THE DEGREASED BONE SAMPLES:
UNCOOKED, HOMOGENEOUS AND POROUS
MORE SAMPLES:
UNCOOKED, POROUS AND HOMOGENOUS

BONEHENGE ........
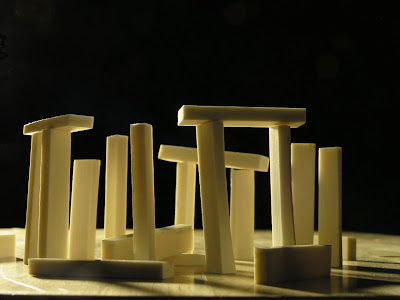
........ IN MOONLIGHT

CUTTING BONE

CUTTING TIE BLOCK INLAYS

ROUGH CUT NUTS, SADDLES AND TIE BLOCK INLAYS

DEGREASING BONE IN COLEMAN'S FUEL

DEGREASING BONE - AFTER 10 DAYS

DEGREASING BONE - AFTER 20 DAYS

DEGREASING BONE - AFTER 30 DAYS

BONE WITH GREASE RESIDUE OR DISCOLORATION

ROUGH SHAPING NUTS

SANDING NUTS TO SHAPE

BOILING ALL THE PIECES

FINAL DEGREASING - AFTER 45 DAYS

THE DEGREASED BONE PIECES

THE DEGREASED BONE SAMPLES:
UNCOOKED, HOMOGENEOUS AND POROUS

MORE SAMPLES:
UNCOOKED, POROUS AND HOMOGENOUS

BONEHENGE ........

........ IN MOONLIGHT

2 comments:
I thought I had left a comment but I don't see it anywhere so I will repeat it :p : Thank you very much for all this information. The photos are lovely
Thank you Lui,
I had not visited my blog for some time and didn't notice that you had posted. My apologies. I made the blog as a visual notebook for myself. I got quite into photography in the process.
Post a Comment