THE END GRAFT
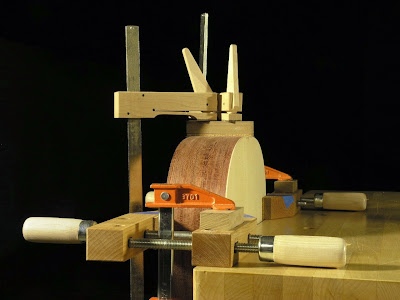
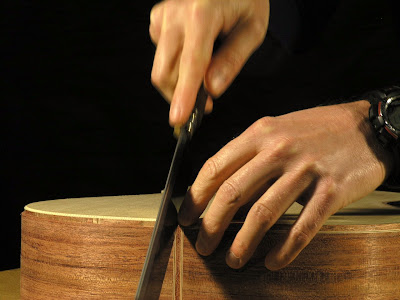
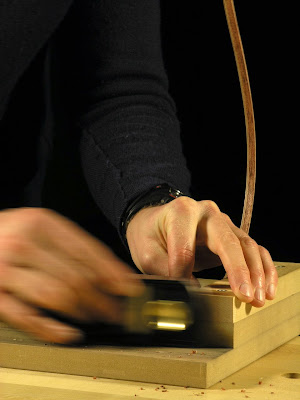
The end graft was made from leftovers of the back strip. To cut the channel for it I clamped the body of the guitar to the bench with two 8" handscrews, neck pointing down. The handscrews themselves were clamped to the bench with two bar clamps and had their jaws padded with cork.
This was a trick I picked up from Cumpiano's book, though he used four cam clamps instead, two above the bench and two below. That would probably provide a little more stability, however the jaws of the handscrews seemed to be wide enough to give adequate support.
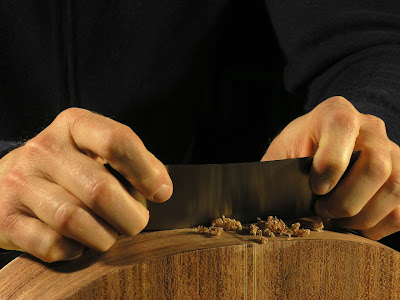
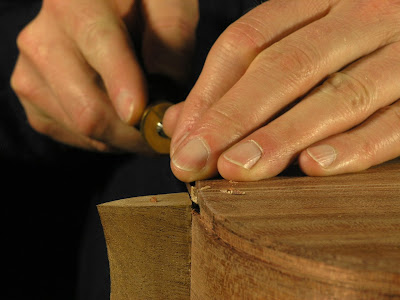
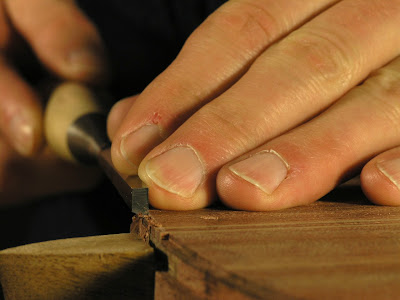
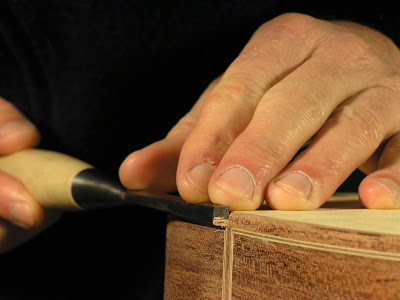
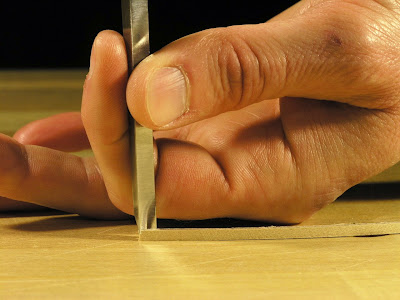
With a small dovetail saw butted up against a square two cuts were made. The square was held up against the soundboard so the cuts would be just on the inside of the back. I had made a stop for the saw so it wouldn't cut any deeper than the sides themselves, about 2.0mm. After the cuts were done the waste was cleared and the channel was carefully widened with a 1/4" chisel until the end graft went in with a snug fit. Well, I didn't end up with quite as snug a fit as I would have liked, but close enough.
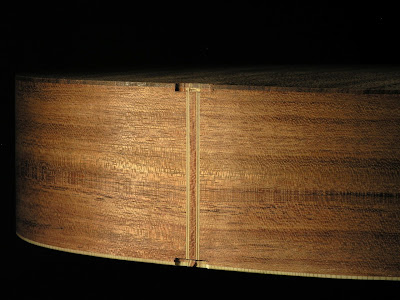
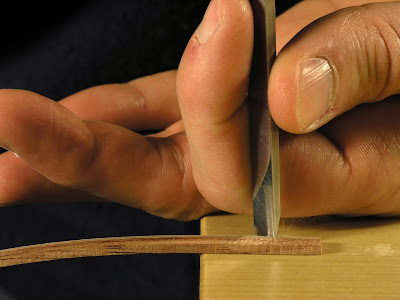
The endgraft was clamped in with two long cam clamps, a corked MDF caul and some waxpaper. Once the glue had dried I first planed, then scraped the graft flush with the sides.
CUTTING THE BINDING CHANNELS
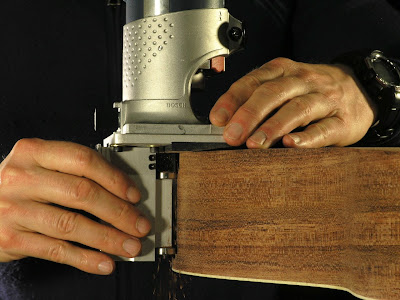
For this I had bought a BOSCH COLT laminate trimmer fitted with a 1/4" spiral downcut bit and a binding router base from Luthiertool. I was quite nervous about using the tool as I'm not very familiar with using powertools. Actually I don't really like using them. I always feel the you just cough and whoops a big chuck of wood has gone.
I did a lot of test cutting in various wood, some soundboard scrap in particular. I had heard that it was easy to get tearout when doing this and I thought it best to give it a spin, so to speak, to see for myself. To my surprise I didn't encounter any problem at all. I routed two circles, one in each direction, and both came out as clean as a baby's bottom.
Encourage by this discovery I felt I was ready to go at it on the guitar. I clamped the guitar by the neck shaft into the patternmakers vise and this proved to be a good way to hold the body while routing the channels.
First up was cutting the end graft to size. As I intended to miter the purfling lines The center of the end graft has to protrude up from the binding channel. I carefully adjusted the depth and width of the cut and carefully routed little steps at each ends of the end graft. So far so good.
Next up was the binding channel. I started on the back and moved confidently along about 2" when I discovered the channel looked a little wide, and sure enough somehow I managed to add a 1/16" to the width. I don't know how it happened, but I have a feeling it was the locking screw that hadn't been tightened enough and had come loose. Regardless, I had to reset the width and try again. Second time went better. I flipped the guitar over and started the soundboard side.
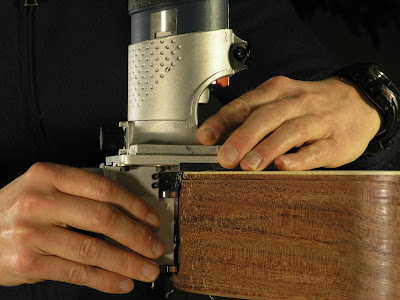
This did not go so well, I started to experiment with holding the router in different ways and learned that it is best controlled when holding the fence with one hand while the other hand holds the base itself. I tried to have the other hand hold the router too and this appeared more comfortable to me and provided easy access to the on/off switch. However, I also learned that holding the router this way gave less stability to the hole unit, resulting in tilting the router towards the guitar and thereby widening the cut.
I bit flustered by this setback, I decided to sleep on it and continue the day after with, hopefully, fresh eyes. Before, I left it I had the 'ingenious' idea to maybe I could build up the troubled spot with some veneer and so I did. The next day I went over the trouble spot with the router and it seemed to do the trick.
Next up was the purfling channels. These were done in the same manner as the binding channels though the router had to be adjusted for the wider more shallow cut. Again testing was done on scrap. I first cut the back and then the soundboard side. The cut on the soundboard side had to be adjusted to an even wider channel as an extra rosewood veneer band was going to be added to contrast the maple purfling line with the soundboard spruce.
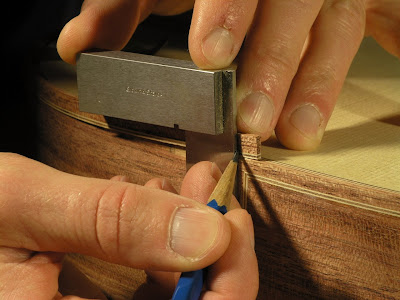
Last the end of purling and binding channels were completed with a 1/4" freshly sharpened chisel by slowly paring the waste away. At the end where the purfling channels met the end strip and back strip, particular care had to be taken not to let the chisel slip and cut into the purflings surrounding them. At the neck shaft a razor saw was used to cut the binding channel across and a 1mm chisel to clear the waste. At the soundboard the web from the neck was left intact and the channels were stopped at about 3/4" into the neck. On the back the binding channel was continued through the heel and the purfling channel stopped at the back strip.
Cutting the last bit of the channels with just a chisel, ensuring continuation of the smooth, flowing curves while maintaining accuracy was quite challenging. A purfling cutter would have been very helpful, but patience, diligence and a fair amount of trial and error did go along way.
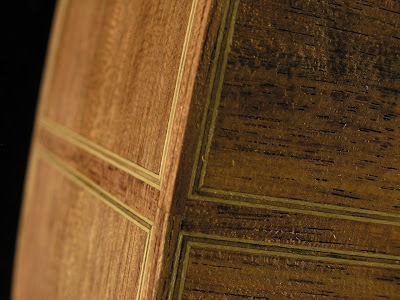
Last the all the ends of the purflings on the back and end strip was trimmed to a 45° miter. I used the reflection in the polished back of the chisel as a guide for this.
FITTING THE BINDING AND PURFLING STRIPS -THE FIRST SOUNDBOARD BINDING STRIP
Following the books I have it appears that each author have their own way of going about this. Cumpiano glues all the elements on at the same time but a few inches at the time. Bogdanovich and Courtnall and others do the purflings first then the binding.
Since both my purflings and bindings were a little on the high side I though it would be best to glue them all on in one go. This way the purflings would sit snugly in the ledge between the soundboard and the binding with little possibility of tilting when taped on. Other than that I wanted to try out different scenarios, both adding glue to the whole set-up at once as well as in stages per Cumpiano.
First to go on was the top right binding (looking at the top with the neck pointing upwards). I had thought of bending the extra line of rosewood veneer that but it was quite bendable in itself and so I didn't really see the need for it.
Both the binding and purlings were taped on dry and the ends were marked with pencil and cut to length at the neck and slightly long and the tail. Furthermore the side purflings that had already been glued to the sides had to be mitered. This was done right on the mark and the waste cleared with a chisel. Like on the back and end strip I used the polished back of the chisel as a visual aid to get a perfect 45º angle.
A final dry fit was performed and a few adjustments were made to get a snug fit and everything was ready to be glued on.
On the first strip I wanted to try and glue it all in at once and so I added glue, Titebond II slow set, to the binding channel, the outside of the purfling and the rosewood veneer strip and spread it as quickly as I could. All the strips were held in place and the first tape strip was added about 1" away from the tail end. This gave a clear view of the the mitered joint between the side and end strip purflings and a chance to correct errors before the very end was taped on, a tip I lifted from Cumpiano's book.
In order avoid having the strips move about too much smearing glue onto the soundboard I loosely put tape strips on about 4" apart until the whole binding/purflings were secured. Then the binding was firmly taped on adding strips 1 - 1½" apart starting from the tail all the way up to the neck.
However, the next day I realized that was not a good way to go about things as the binding and purflings had buckled a bit and left gaps of about 0.5mm, 1/64", one between the binding and the purfling and one around the rosewood line around the upper bout. I think that the glue might had set as I it was loosely taped on before I got it taped on properly and there was no way for the strip to move into it's pocket between the body and the neck. That, or the binding and purflings were simply cut too long. Well, you live and learn.
I removed the taped and started to trim the excess binding and purflings off. On the top I did this with a spokeshave set with the blade set at an angle, meaning retrieved fully on the side that was over the soundboard and set to a moderate cut on the other side, giving the center a very fine cut. This way I could monitor how thick the cuts would be depending on how the spokeshave was held and it eliminated the chance of the blade suddenly digging into the soundboard.
I continued this way until the binding and purflings were almost flush with the soundboard and switched to a scraper that had the side that went over the soundboard protected with tape.
The sides of the binding were almost flush as it was and it was finished with the scraper almost exclusively. However, I did leave the section at the upper bout that had the gaps as I want to try and fix that later.
The very end of the binding was cut right at the center of the template with a razor saw held at about an 45º, taking care not to cut into the soundboard and the end strip. The waste was cleaned up with a 1/4" chisel, and the second strip was ready to go on.
THE SECOND SOUNDBOARD BINDING STRIP
This was done pretty much the same way as the first one. However, in order not to get a gap in the binding on the second strip I decided to try and go with Cumpiano's suggestion of gluing the binding on in increments. This worked fairly well, if a bit fiddly having to add glue to the rosewood strip, purfling and binding channel. But armed with the experience from the round I took care making sure everything went in nice and snug.
Another thing I did differently was to use the shooting board to true the ends of the purflings and binding. This worked really well and ensured a nice fit where they butted up against each other at the center.
THE FIRST AND SECOND BACK BINDING STRIP
For these two I followed most of the procedures of the first ones, but this time the purflings had to be mitered at both ends and the bindings had to be cut to exact length as they were butted up against each other both at the tail and neck end. The rosewood line was omitted.
This time around I didn't glue the first binding strip in extending over the middle of the template, but cut it to exact length. I thought this made more sense since the mitered side purflings functioned as a stop that determined the exact position of the binding in the channel.
This was altogether a little more challenging to do, but a lot of dry runs eventually yielded a nice fit. Also the purflings and bindings were glued on together in one go. I thought this was doable since it was only two components to deal with. Had all the purfling lines not been glued together before hand, I think Cumpiano's method of gluing in 1-2" increments had made more sense.
A SHORT NOTE ON BINDING TAPE
I have read several accounts on how easy it is to tear wood fibers from the soundboard when using tape to clamp the binding in. In order to figure out what I was up against I taped three different kinds of tape the some soundboard scrap - regular masking tape, blue 'light tack' masking tape, and StewMac brown binding tape.
I cut a 4" strip of each of them and pressed them to the soundboard scrap as firmly as I could and left them overnight. The next day I started by peeling off the first half slowly and then ripping the rest off with considerate force. To my surprise none of them teared the slightest.
I started to wonder why this was and came to the conclusion that maybe it had something to do with the fact that the soundboard still had a planed surface on it that had never been sanded. The fact that a sanded surface, even a finely sanded one, leaves a surface of torn wood fibers and a planed one doesn't may have been the reason. I don't know if this is true but it was the only logical conclusion I could think of.
StewMac brown binding tape was very nice to work with, though it is a bit pricier than regular masking tape. It seemed very strong and was very resistant to tearing.
CUTTING THE END GRAFT CHANNEL
 PARING END GRAFT CHANNEL WASTE
 GLUING TH END GRAFT
 SCRAPING THE END GRAFT FLUSH
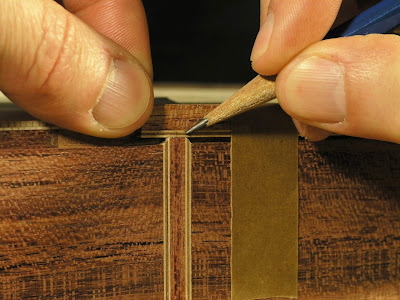
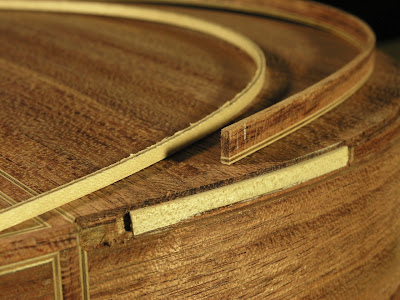
 THE END GRAFT CUT
 CUTTING THE BINDING REBATE
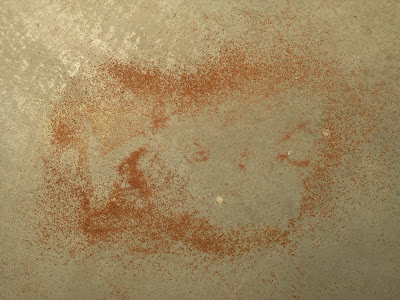
 BINDING CHANNEL ROUTER DUST
 CUTTING THE PURFLING REBATE
 TRIMMING THE BINDING CHANNEL TO THE END GRAFT

CUTTING THE CONTINUING BINDING CHANNEL AT THE HEEL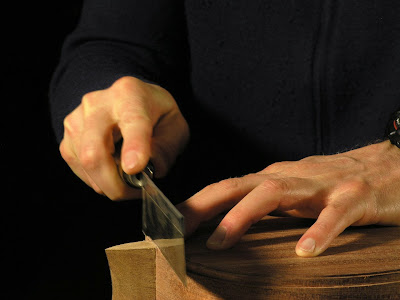 EXCAVATING BINDING CHANNEL AT THE HEEL
 PARING THE CONTINUING PURFLING CHANNEL AT THE HEEL
 MITERING THE PURFLINGS
 TRIMMING BINDING TO LENGTH
MITERING SIDE PURFLINGS
 TRIMMING FIRST BINDING AND PURFLINGS TO LENGTH
 PARING FIRST BINDING AND PURFLING WASTE
 MARKING SECOND BINDING AND PURFLINGS FOR LENGTH
 CUTTING BINDING TO LENGTH
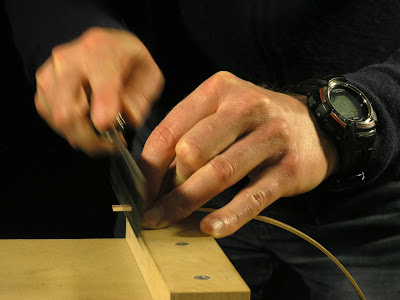 TRUING BINDING END
 BUILT UP BINDING CHANNEL
 MITERING BACK PURFLINGS
 GLUING ON BINDING AND PURFLINGS FOR THE BACK
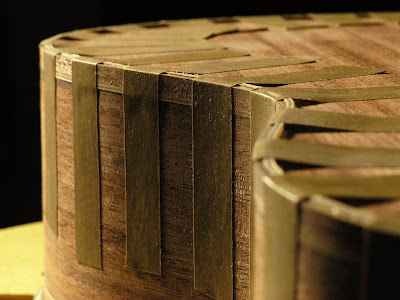
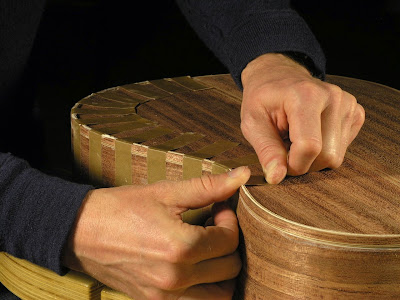 THE BACK WITH BINDING AND PURFLING TAPED ON
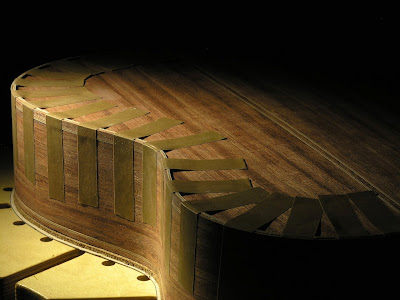 THE BACK WITH BINDING AND PURFLING TAPED ON
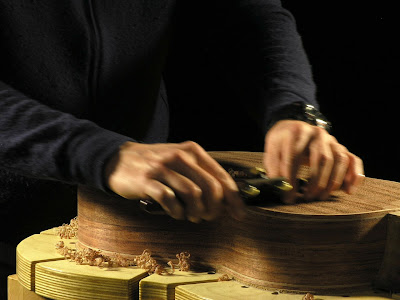
 SHAVING THE TOP OF THE BINDING FLUSH
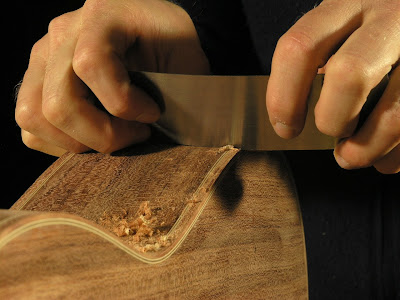
 SCRAPING THE SIDE OF THE BINDING FLUSH
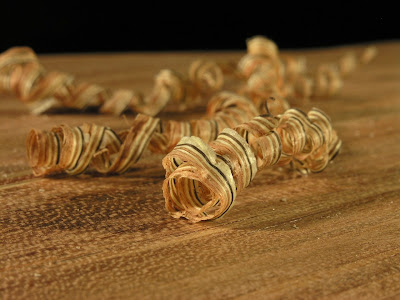
 BINDING SHAVINGS
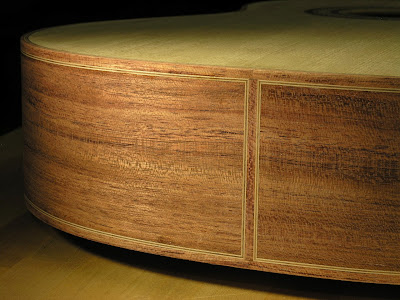
 BINDING DETAIL
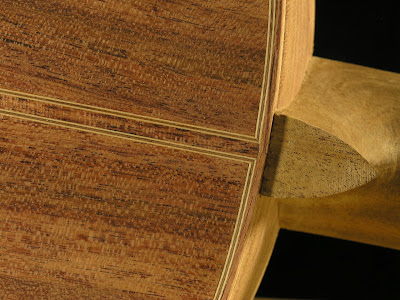
 BINDING DETAIL
 BINDING DETAIL